Rewriting the JSAddin with React/Redux – 5 Lessons Learned
Over the last two quarters at Vena we had the opportunity to give some love to one of our core codebases — a JavaScript add-in (henceforth known as the JSAddin) embedded in Office365. The project was built under tight time constraints and quickly became a pain to extend and maintain.
Try not to be this guy
Note: This post is going to assume some familiarity with React and Redux.
The Breaking Point
The JSAddin, a composition of JQuery / Office Fabric UI / Vanilla JS, had reached a breaking point for a few reasons:
- As a highly configurable product, we had a tough time modifying functionality without getting hit by multiple unintended side effects — mostly in the form of UI bugs.
- High coupling and low cohesion resulted in the JSAddin being difficult to test. Building an application in Office365 involves juggling external dependencies (Excel’s API / our back-end / browser APIs) and a lack of best practices made that…difficult.
- Lack of developer happiness (or HYPE —a word we find any excuse to use on the O365 team). Simple features took a long time to deliver and the ratio of feature work to bug-fixes was quickly becoming demotivating.
The problems basically boiled down to inefficient patterns around state, dependencies, and reusability. The codebase had reached a point where it made more sense to rewrite than to refactor…and rewrite we did! We started diving in early this year after identifying React/Redux as our technology of choice.
Lessons Learned
Building best practices into the JSAddin has been a team effort and we’ve experimented quite a bit over the last few months. Without further ado, here lay five best practices that have given us the most mileage.
Lesson 1. Prioritize Component Reusability
If you haven’t come across it, I would recommend you read Brad Frosts’ article on Atomic Design. We took an atomic approach to building React components, which basically means putting reusability first. It also means being liberal with component props.
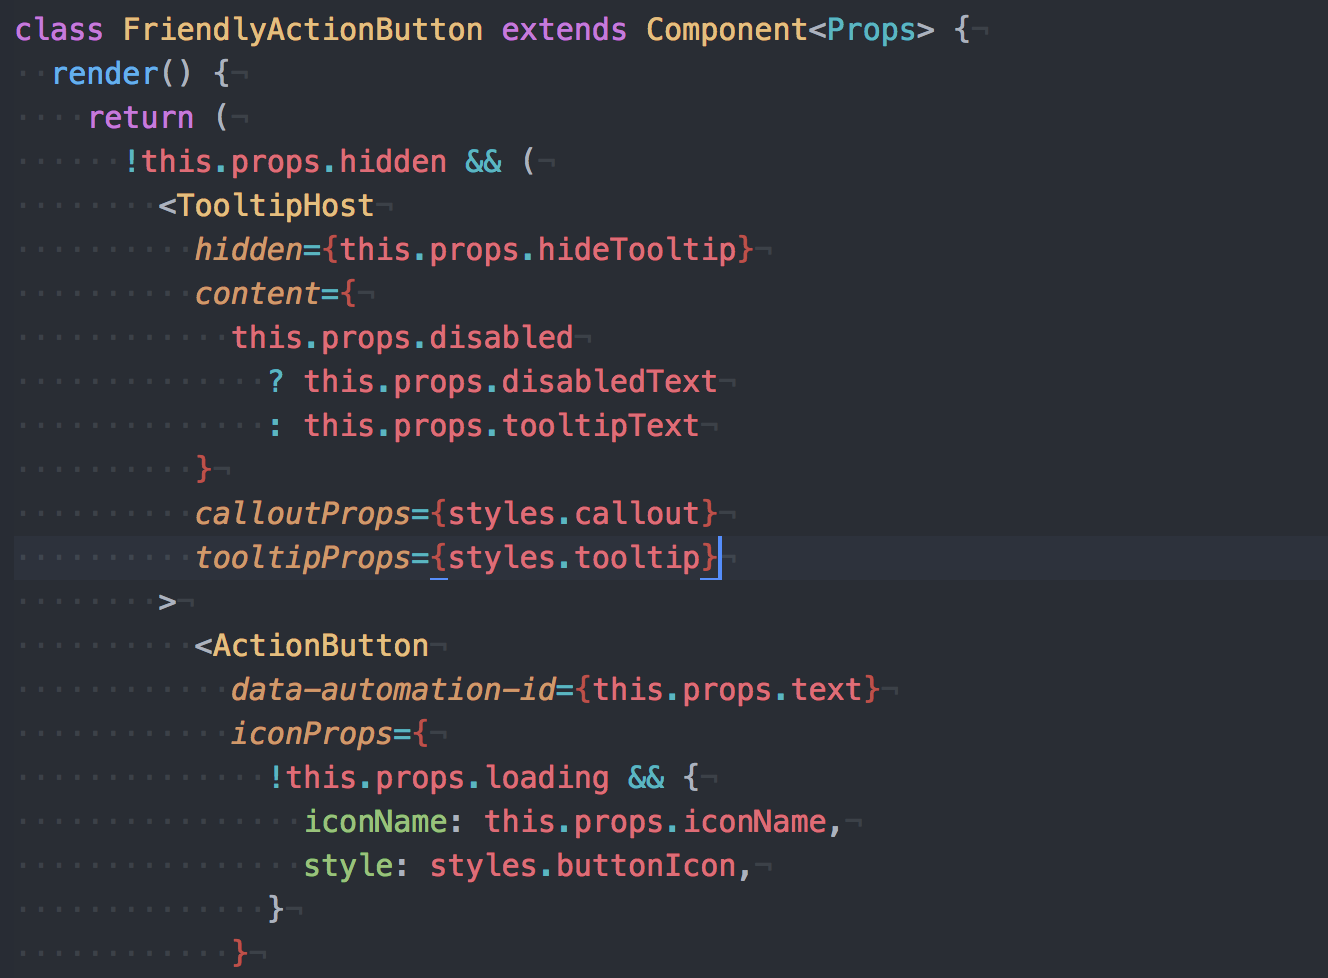
Configurable button with a healthy dose of props
Our focus on reusability also meant employing component patterns when necessary — i.e. higher order components — to decorate base components with custom render behaviour and generic modifications.

Decorating a base component with a callout using a HOC
Building components from the bottom up made it easy for us to conform to a consistent design system and make app-wide style modifications. We’ve also noticed that our UI development velocity is actually increasing with the size of our codebase!
Lesson 2. Write Declarative Actions
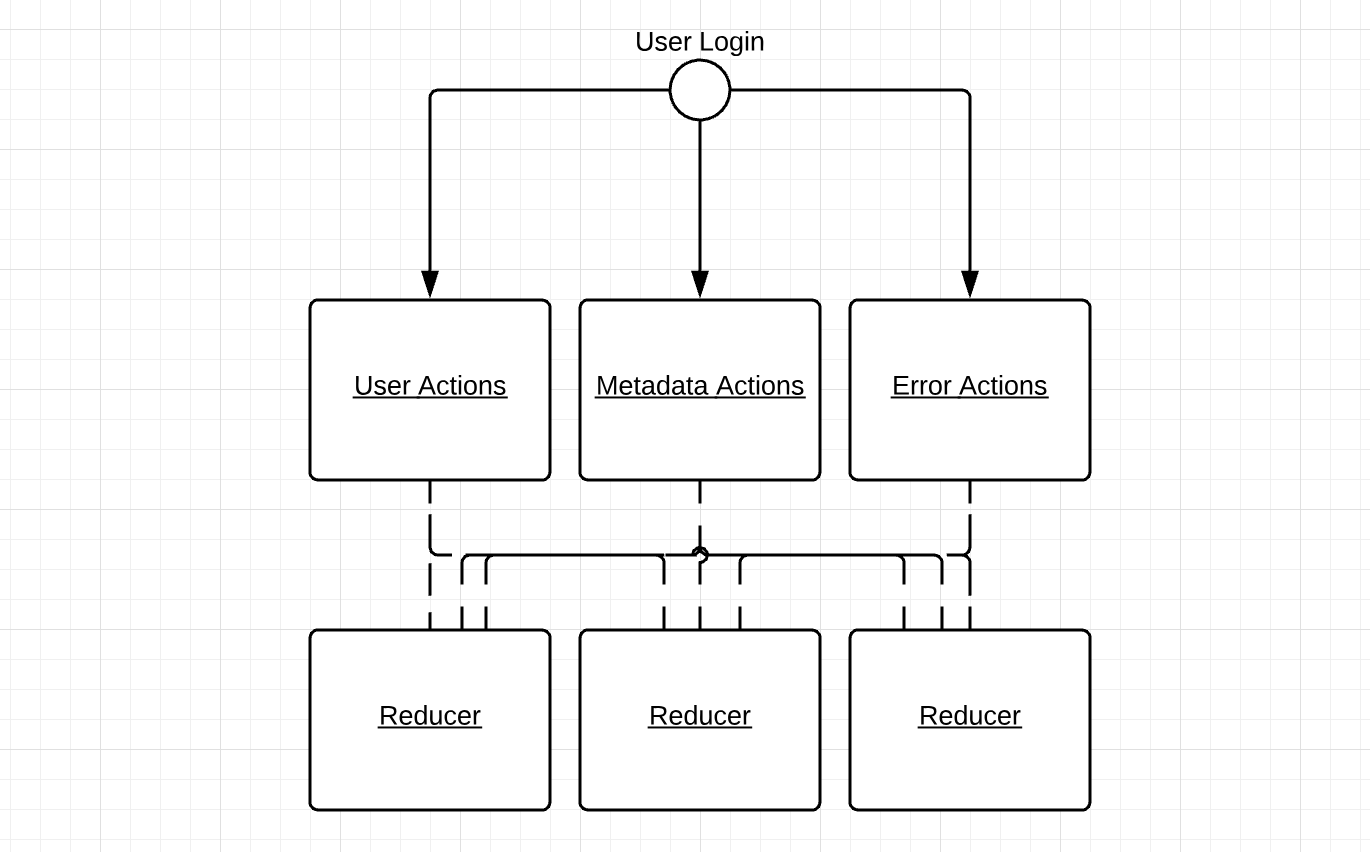
One of the first features that we implemented in React/Redux was authentication. The first iteration of our action creators explicitly described state changes with very little tie-in to actual user actions. Our login flow looked something like this:
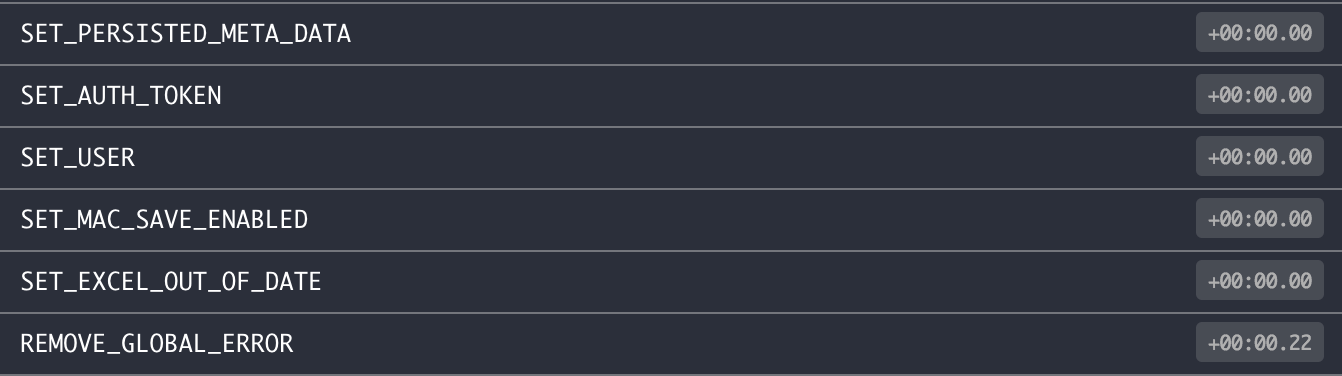
Imperative Redux
We quickly realized that using action creators as a glorified setter for your redux state is a great way to obscure your action log and build a confusing mental model for your application.
Having actions that don’t correspond with the actual user action
Moving away from imperative action creators towards a more declarative approach results in a much simpler mental model for state changes and produces a nice and clean action log.

Declarative Redux — a bit easier to read
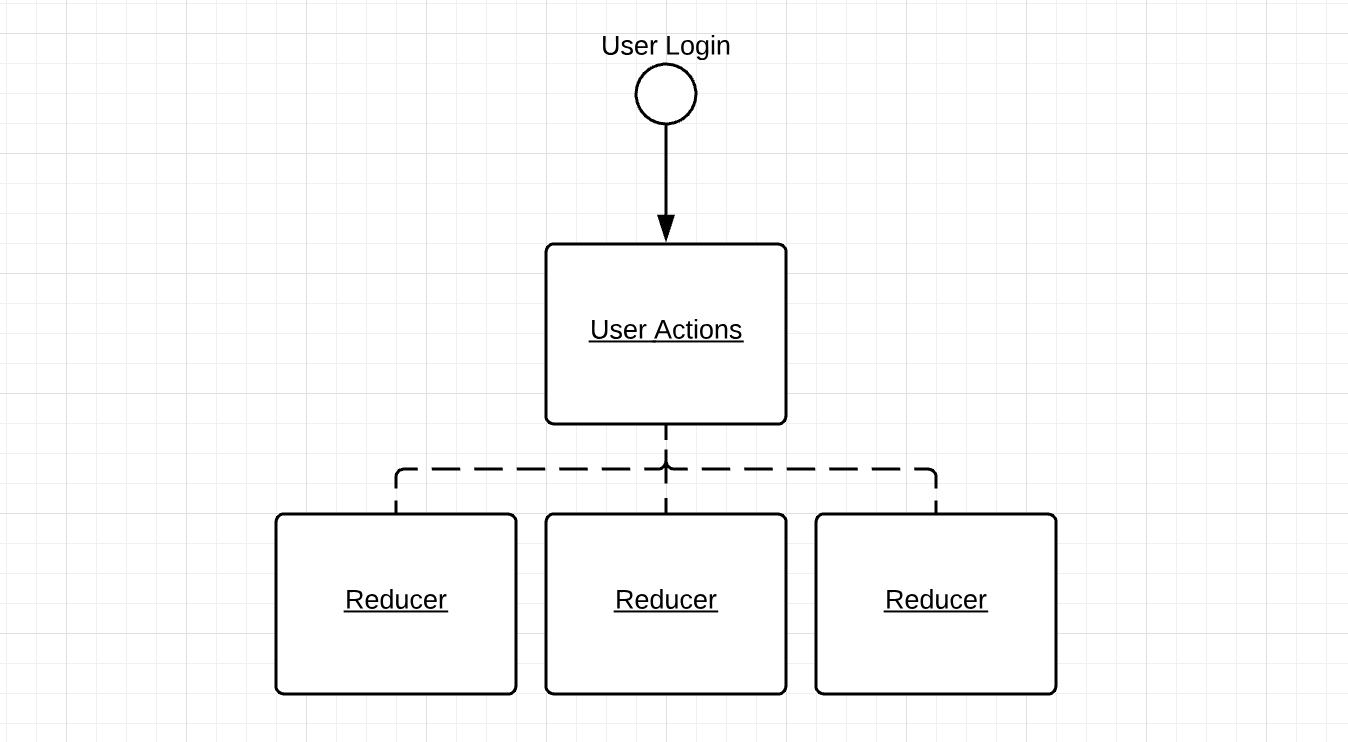
No more overlapping lines!
Lesson 3. Make Error Handling a Breeze
There are a few places in a React/Redux application where exceptions need some special handling.
- Exceptions in custom component methods or internal/external JS dependencies. (Typical JS errors)
- Exceptions in Redux flow. (actions/reducers)
- Exceptions in event handlers.
The first features we wrote with React/Redux had logic buried in component methods or services which were called directly by components. This meant that we had to remember to try {} catch {} potential errors and resulted in quite a few unhandled exceptions.
Yikes.
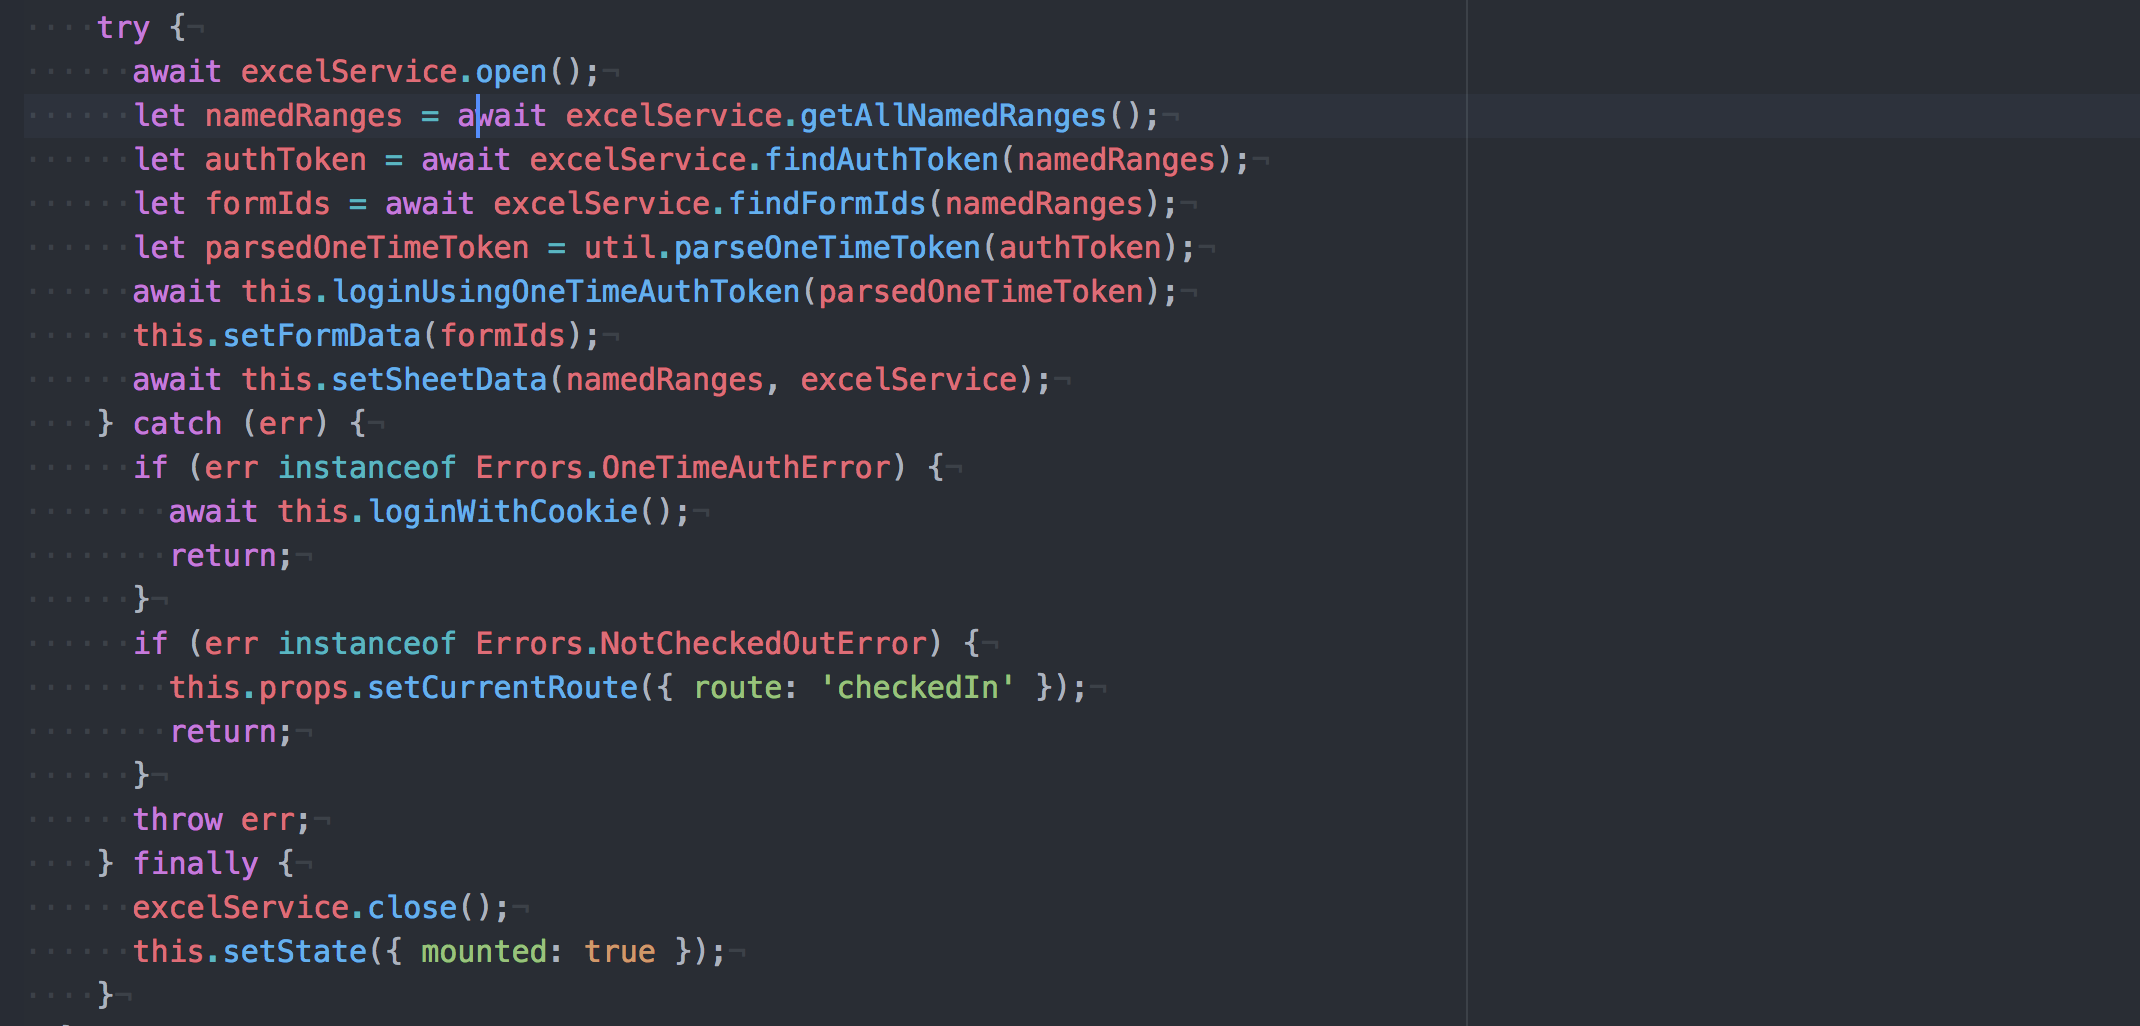
We soon found out that it was much easier to handle exceptions within the Redux flow — specifically in actions — with the help of middleware. Even just having a simple snippet such as the one below was enough to guarantee that all exceptions thrown in action-creators would be handled in some shape or form.
Embedded JavaScript
Moving business logic and service calls from components into actions basically eliminated a whole class of errors (1) and significantly reduced the frequency of another (3).
Lesson 4. Leverage Middleware
When we started building our React/Redux application most of the excitement and focus was around component composition and state simplification. Later on, we discovered the power of middleware — a logical layer that can act on redux actions in transit.
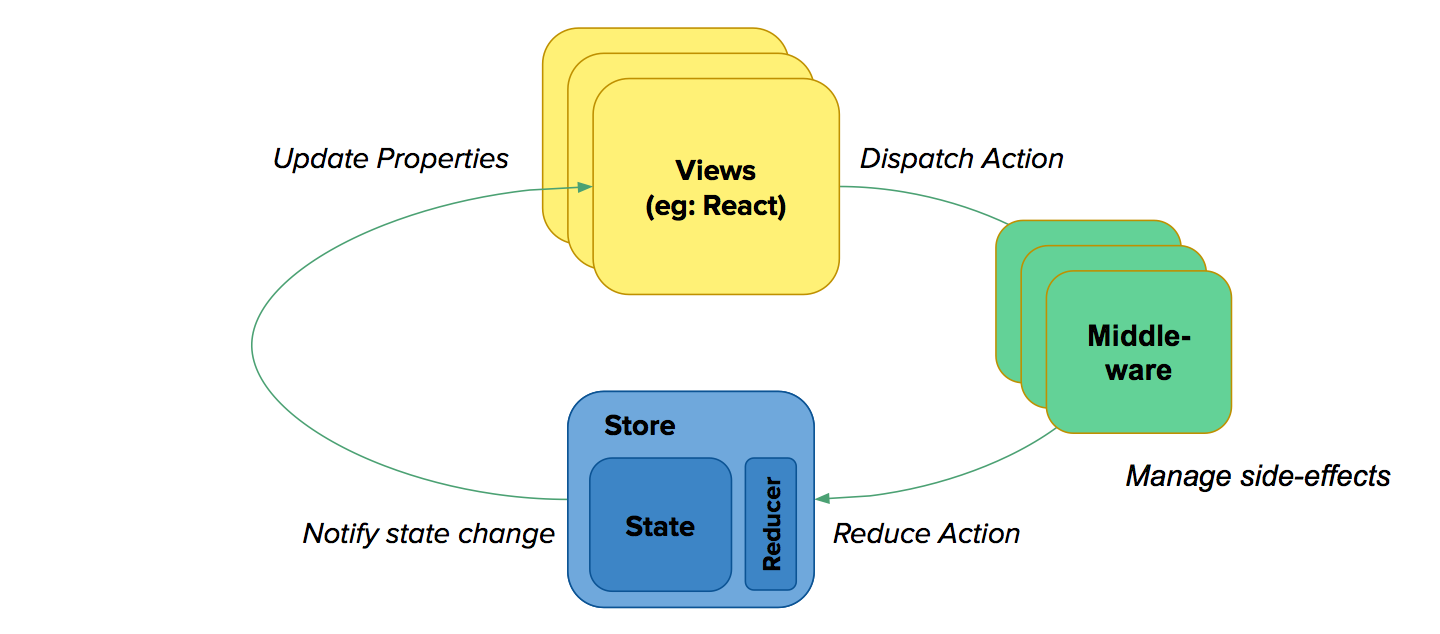
Middleware — a highly flexible layer between action dispatch and reduction
Having the ability to view, augment and modify a stream of actions as they happen is extremely powerful and makes it easy to implement features such as analytics, error handling, and logging.
An area where middleware has saved my team more than a few headaches is request handling. Trying to coordinate request states (pending, failure, success, cancelled) and making those states available for consumption by connected components (components able to access Redux state) is a task that would normally require a ton of boilerplate. Thankfully, we can simply write actions that look like this:
Embedded JavaScript
The request middleware will intercept this action and immediately dispatch AUTH_PENDING. It will then execute the given promise and dispatch AUTH_SUCCESS or AUTH_FAILURE based on whether an error occurred - in the above example there are also overrides for success and failure callbacks. Just a few lines of middleware can guarantee that asynchronous request states are handled app-wide in a consistent way!
Lesson 5. Place Emphasis on Developer Tooling
The impact of high value developer tooling cannot be overstated when it comes to building a quality codebase and maintaining developer happiness. We took time up-front to decide on the tooling we wanted to use before implementing user-facing features. Tools that made working on the JSAddin a pleasure include:
- ESLint — Reducing the possibility of silly typos and unsafe code makes for easier code reviews. There are some great framework specific ESLint plugins.
- Prettier —I try to avoid remembering the dark days before code auto-formatting.
- Flow — Flow brings opt-in type checking to a dynamic language with features like generics, optional nullability, type aliasing, disjoint unions and type inferencing. Achieving complete type safety is probably not going to happen (and it’s probably not worth it to try) but we’ve been happy with the gradual diffusion of parameter checking, prop / state typing, and referential transparency into the JSAddin.
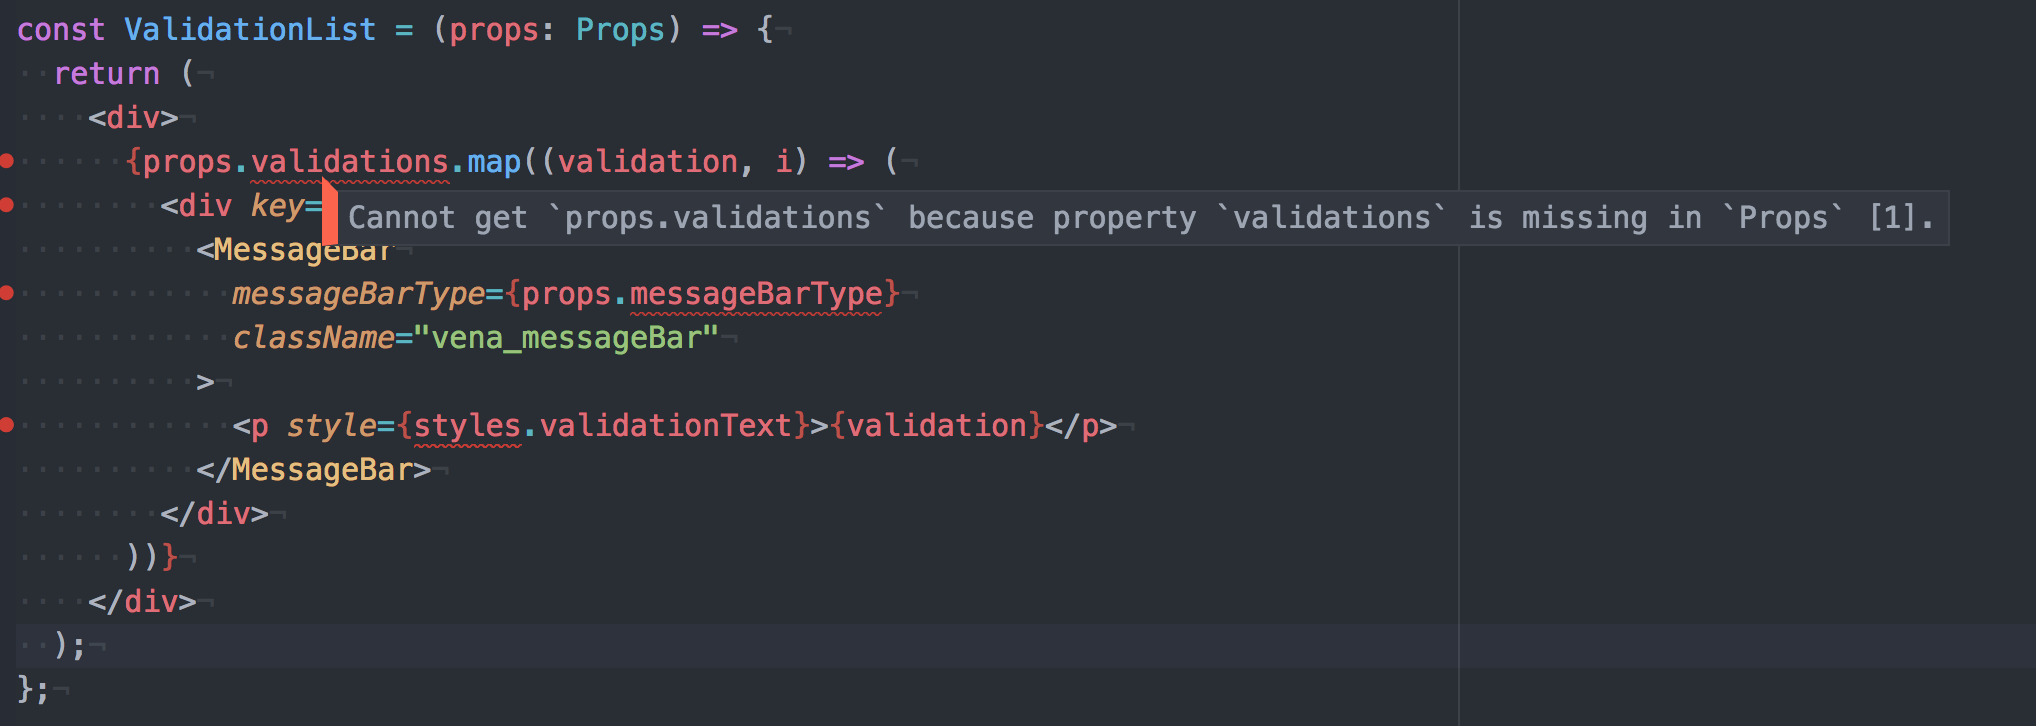
Doesn’t this just scream “FIX ME”?
Automating away tedious human errors gives us the time to focus on the more hard hitting issues.
Looking Forward
This is just the beginning of Vena’s foray into front-end modernization as we continue improving best practices throughout our codebases. Rewriting the JSAddin has been a great learning experience thus far and we’re ready to dive even deeper in our mission to provide a delightful experience for both our users and ourselves!